
How to Issue NFT on BSC BAS Aries Testnet using the Black IDE.
In this tutorial, we provide a step-by-step guide to the readers on how to issue Non-fungible tokens (NFTs) (ERC 721/1155) on BSC BAS Aries Testnet using the Black IDE.
Before we start, a quick question, do you have any idea about how to create your NFT with MegaNode? If you want to know more, please check our article 👉 ( Create your First NFT on BSC Using MegaNode in 5mins)
Black IDE is an integrated development environment (IDE), making developing Ethereum smart contracts faster and easier. Black IDE is a multi-platform graphic IDE for smart contract development on BNB Chain, Ethereum, and EVM-compatible blockchains. It is one of the most powerful solidity IDE on the market that has integrated some most popular toolkits in the Ethereum world, including Truffle, Hardhat, Waffle, Geth, web3.js/ethers.js, Etherscan API, and MetaMask.
In this tutorial, we provide a step-by-step guide to the readers on how to issue Non-fungible tokens (NFTs) (ERC 721/1155) on BSC BAS Aries Testnet using the Black IDE.
Get Started!
We aim to keep this tutorial as simple as possible and hence tend to use as minimal resources as possible.
Set up the Environment:
Metamask Wallet
Ensure that you have the Metamask Wallet extension installed and running on our browser.
Configure the Metamask wallet for use with the Aries Testnet. Use the following details to add the Aries Testnet. For further details, refer here.
Network Name: Aries Testnet
RPC URL: https://bas-aries-public.nodereal.io/
Chain ID: 0x75 or 117
Currency Symbol: ARS
Block Explorer URL: https://bas-aries-testnet-explorer.nodereal.io/
Black IDE: You can choose to use a desktop app or web app .
Today we will use the desktop app as the web app lacks support for importing OpenZeppelin Contracts.
Login into Black IDE
- Open the Black IDE desktop application. We will be using it for compiling and deploying our smart contract for NFTs on the BAS Aries Testnet.
- Click on the Login button and authorize using your GitHub account.

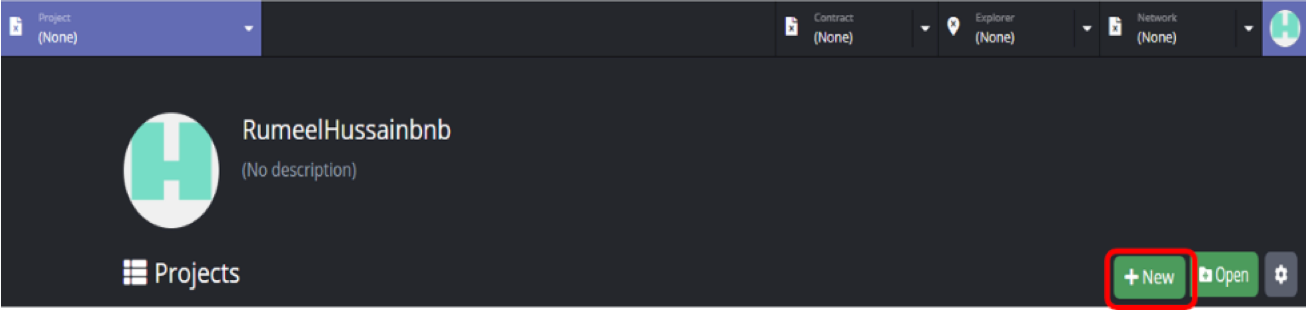
Create New Project
- Click on the New button next to the projects to create a new project.
2. Specify the location where you want to save your project on your device, the project name, e.g. “BAS-NFT”, and select the project type from the dropdown list as “Basics- ERC20, ERC721, & ERC1155 (v31+)”. Then click the Create button to create the project.

3. Remember the smart contract in this tutorial is just a sample, you can always modify and be innovative.
Smart Contract Creation
- Expand the contracts menu and delete the default files.

2. Right-click on the contracts menu and select New File. Specify the name for your file, e.g., BAS-NFT.sol, and then click Create button.

Write your smart contract code
- Copy the following code into your smart contract file. We have used the contract code from this repo.
- Remember to change the MINT_PRICE, MAX_SUPPLY, name, and symbol of the token as per your need. Also, remember to change the _baseURI as per your token.


Edit default project settings
Click on the config.json file to change the default setting. Change the main file name to the name of your contract, BASNFT.sol in our case. Similarly, change the name of the smart contract to deploy, BASNFT.json in our case.

Connect the Black IDE to the BAS Aries Testnet
- In order to connect the Black IDE to the BAS Aries Testnet, we will have to add a custom network configuration. Click on the dropdown icon on the network menu in the top right corner and then select custom.

2. As we currently don’t have any custom networks defined the list is empty. Click on NEW CONNECTION button to define a new custom network.

3. Specify the name and URL of the node RPC as shown in the figure below. Then click on the CHECK NETWORK button to verify that the details are correct.

4. Upon successful verification, network information is displayed. The chain id for BAS Aries testnet is 117. Make sure you have the correct info displayed as shown in the figure below. Then click on the ADD NETWORK button.

5. Once added, click on the CONNECT button.

6. Navigate back to your project by clicking on the project name in the upper left corner of the IDE.

7. Click on the

icon in the bottom left corner of the IDE to generate new keypair to perform transactions. You can skip this step if you already have generated a keypair. On the Keypair Manager, click on the CREATE button to generate new keypair.

8. Specify your desired name for the keypair, in our case BAS-Aries-Test-Keypair. Then click on the CREATE button. Remember to keep your private keys securely and not share them with anyone.

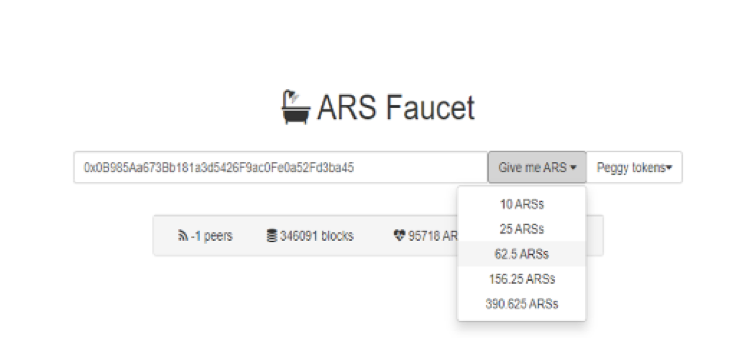
Acquire Test Tokens
- Initially, the balance of a newly created keypair is 0.0 ETH. To get ARS test tokens, you can use the BAS Aries Testnet Faucet.
- Copy your public address from the keypair manager

3. Paste this on the facet and acquire test tokens as required, as shown below.
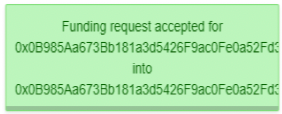
4. A green pop up is displayed on successful transfer of test tokens, as shown below.
5. Close and reopen keypair manager to verify that the balance has been updated. Wait for approx. 1-2 mins for balance to get updated.

Deploy Smart Contract on BAS Aries Testnet
- Select the appropriate Solidity compiler version from the bottom right corner of the IDE, Solc (0.8.4)in our case.

2. Click on the Build icon

to build your smart contract. Upon successful build, the project navigation pane reflects a new folder named as build. This folder contains a contracts folder that has .JSON files of the contracts build. All of the contracts that were imported in our BASNFT contract are also built and imported as .JSON files.

3. After successfully building your contract, it’s time to deploy the contract. Click on the Deploy icon

for deploying your smart contract. Specify the details for your contract, as shown below, then click on the Estimate & Deploy button. The wizard will auto-estimate and fill the gas limit for your contract. Then click the Deploy button.


4. Deployment details will pop-up, as shown in the figure below.

5. The status of the transaction will be updated to confirmed after the transaction is confirmed as shown in the figure below

6. You can also view this transaction by clicking on the transaction icon in the bottom left on the IDE.

Interact with deployed smart contract and Mint NFTs
- You can also interact with the contract using the different functions. Click on the Transactions Icon on the bottom-left corner of the IDE and then transaction of deployment of your smart contract. On the transaction details, click on the contract address to access the functions to interact with the smart contract.


2. The left most column has all the Write Functions. The middle column has the View Functions and the rightmost column has the Events details.
Mint NFTs
- As per our smart contract, when the contract is deployed, unless the NFTs are minted they won’t be visible in the wallet.
- Create another keypair as defined previously. We will be issuing i.e. minting NFTs to the public address of this new keypair.
- To mint i.e. issue an NFT to a specific user we use the “safeMint” function of the deployed smart contract. As shown in Steps 1 and 2 in the figure below, navigate to the deployed contracts then in the left-most column click the drop down menu to view the list of write functions available for use with the deployed contract. Select the “safeMint” function.

4. Use the safeMint function to mint new NFTs to a specific user address. As shown in figure above, steps 3 to 6, enter the “ETH to send” as the minting price of NFT, as per our smart contract the minting price is 50000000000000000 Wei, i.e., 0.05 ETH. We entered 0.06 ETH to cover the transaction charges as well. Then select the address to whom you want to issue (mint) an NFT to. Here, for the To address use the newly generated keypair in the section above. After this, click the transact button

to execute the safeMint function. For the Signer, ensure that you are using the account that was used to deploy the smart contract.
5. To confirm what transfers have occurred, execute the Transfer event from the right most column. This will display the list of NFT transfers along with NFT token id, as shown in the figure below.

6. To confirm the owner of an NFT, use the ownerOf function. Pass the token id as input to the function, as illustrated in the figure below.

View Your NFTs in Metamask Wallet
- On the receiving end, the user can import the NFT token details into their Metamask wallet to view the assets. Please note that currently, Metamask Web Extension does not support the use of NFTs however, the mobile app version does support it. For the next steps to view the owned NFTs in your Metamask wallet, we will be using the Metamask Mobile Application.
- Open Keypair manager on the Black IDE and copy the private key of the keypair that you minted i.e., transfer NFT.

3. On the Metamask wallet mobile app, import an account using this key pair. Enter the private key copied in the previous step and click import.

4. After importing the account, the next step is to add the BAS Aries Testnet configuration to the wallet. Ensure that you are using the same account whose public address was issued by the NFT.

5. Ensure that your account is connected to the BAS Aries Testnet. Also, ensure that you have enough ARS test tokens in your account. If not, you can use the BAS Aries Testnet Faucet to acquire some, as mentioned earlier.

6. To view the owned NFT assets of your Metamask Mobile Wallet, click on the NFTs tab and then on the Import Tokens. Fill in the NFT details. In the address field, pass the address of the deployed contract and in the Id field pass the tokenID. Then click the Import button.

These are the simple steps to deploy an NFT smart contract on the BAS Aries Testnet and then issue or mint NFTs to different users using the Black IDE from Obsidian Labs.
Last but not least, if you are interested in deploying your own custom BAS but don’t know how to start, we get you covered! NodeReal can deploy the whole infrastructure for you. Submit your application here and our team will reach you asap.
Join Our Community
Join our community to learn more about NodeReal and stay up to date with us!